1. Save you packages into UTGame/Content (to avoid UDK failing to locate your files) 2. Make a directory in your Development/Src/Name_of_Your_Game/Classes 3. Inside Classes, make sure you copy these uc files UTGameInfo.uc, UTPawn.uc, and UTPlayerController.uc. Rename them to Name_of_Your_GameGameInfo.uc, Name_of_Your_GamePawn.uc and Name_of_Your_GamePlayerController.uc (you can find these files in the UTGame/Classes directory) 4. Open up each uc file and change the script so that the lines refer to whatever you are referencing (your custom char, anim etc) eg: class Name_of_Your_GamePlayerController extends UTPlayerController; etc etc etc DefaultProperties ( defaultMesh=SkeletalMesh'PackageName.PackageSubDirectory.MeshFilename' I MAY be wrong as to those files as I am looking at this documentation: http://udn.epicgames.com/Three/UDKCustomCharacters.html Also, if the custom character is exported out of max and imported into UDK but with issues, then you should ensure the settings are as these: http://udn.epicgames.com/Three/FBXSkeletalMeshPipeline.html#ExportMesh http://udn.epicgames.com/Three/FBXSkeletalMeshPipeline.html#ImportMesh If you're lazy, just look for UDK/Development/Src/Classes and look for UTFamilyInfoLiandri_Male and change the reference from Liandri to whatever your character is referenced (Line 12) Also, open up UTFamilyInfoLiandri and change Line 13. DONE!
Thursday, March 14, 2013
Custom Characters in UDK
There have been some changes to the way one gets the character into UnReal since Unreal Ed. With UDK, things are a little more straightforward but also complicated in other ways (especially if you are used to doing it the old way). So here are some pointers (a full tutorial is in the making I guess):
Wednesday, December 8, 2010
ZBrush R3.5: Creating Normal Maps
Creating normal maps are similar to Polypaint. Make sure your mesh is already UVW unwrapped before exporting as an .OBJ file.
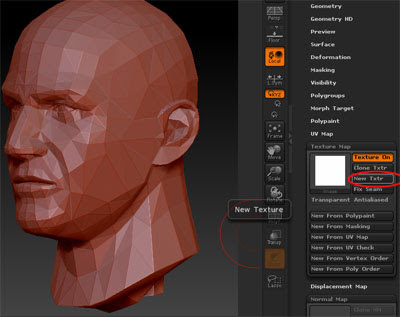
Start by clicking on New Texture.
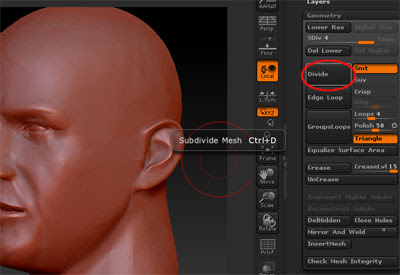
Bring your mesh up to High Res in order to paint good quality normal maps.

Proceed to ZBrush details into your mesh.
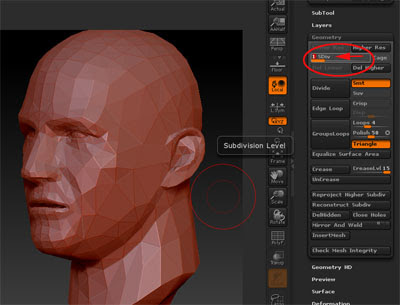
Once done, dial the mesh back down to lowest resolution.
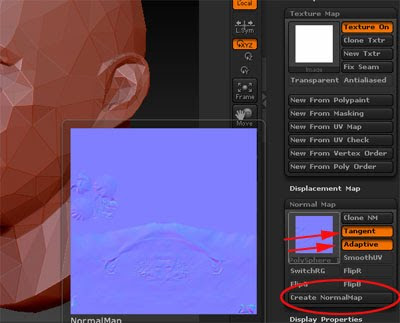
Go to Normal Map and play around with different combinations of Tangent, Adaptive and SmoothUV and click on Create NormalMap.
Once happy, click on CloneNM to bring the map over to the left hand side. Remember to rotate the texture before exporting. Done!

Start by clicking on New Texture.

Bring your mesh up to High Res in order to paint good quality normal maps.

Proceed to ZBrush details into your mesh.

Once done, dial the mesh back down to lowest resolution.

Go to Normal Map and play around with different combinations of Tangent, Adaptive and SmoothUV and click on Create NormalMap.

Once happy, click on CloneNM to bring the map over to the left hand side. Remember to rotate the texture before exporting. Done!
ZBrush R3.5: PolyPainting
PolyPainting in ZBrush R3.5 is very different from R3. It is supposed to be easier but I found out the hard way that it is frustratingly different, not necessarily easier.
Here are the steps:

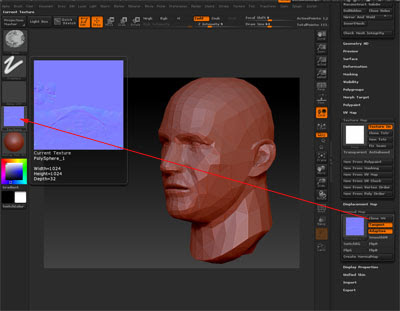
Make sure you already have a 3D mesh modelled, fully UV Unwrapped and exported as .OBJ format. Import this mesh in ZBrush.
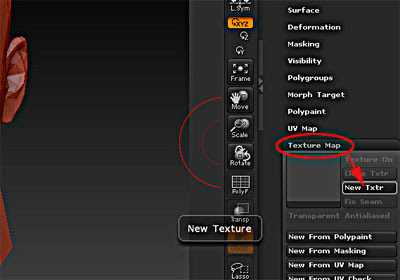
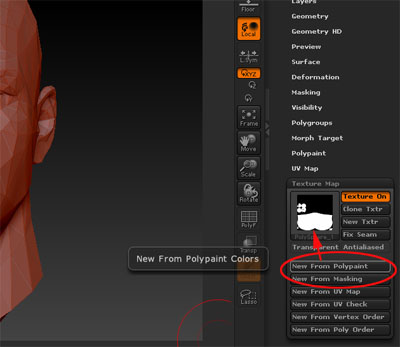
Under Texture Map, click New Texture.

Then click New From Polypaint and you should be getting this upside down UVW Map of your mesh.
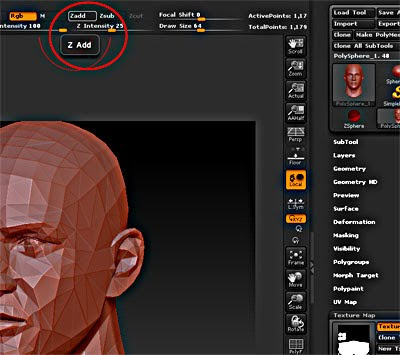
As you only want to affect colours and not the mesh itself, remember to turn off ZAdd. The next step is VERY IMPORTANT. Immediately start painting. You will not see anything. Don't worry.
Toggle the texture off and you will see the results of your earlier painting. If you missed the earlier steps and start painting after turning the texture off, the painting looks screwed up.

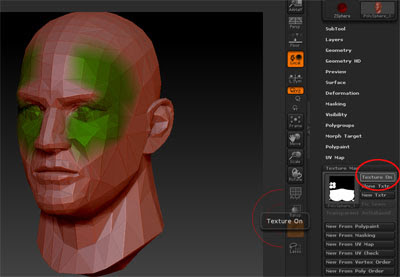
Click New from Polypaint to register the new changes and click Texture On to see the changes.
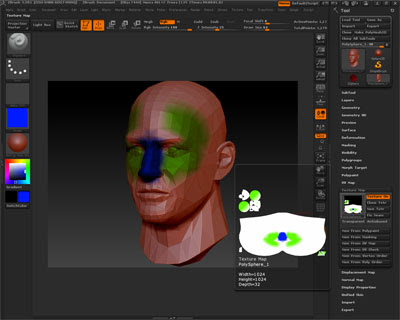
Bring your cursor to the UV thumbnail and you can see the details painted.
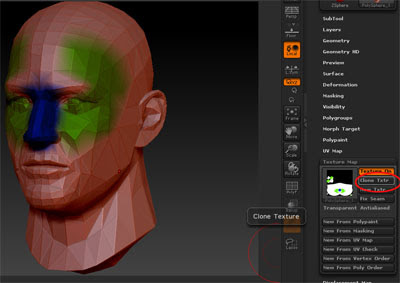
When you are ready to export the painted map, click on Clone Texture.
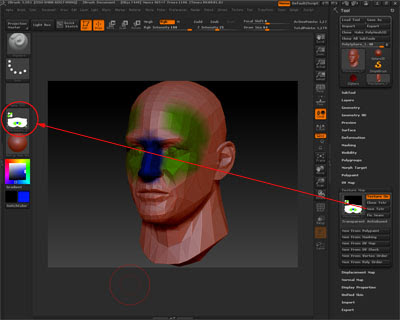
The painted map should be transferred to the left side.
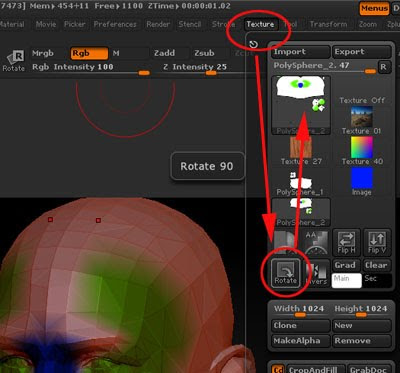
Go to Texture and Rotate the painted texture.
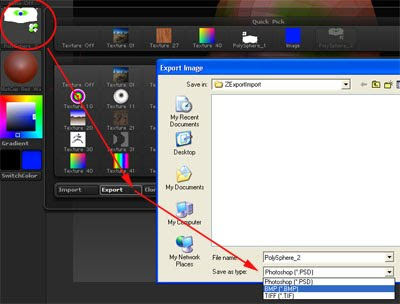
Click on the left hand side image and Export. Done!
Here are the steps:
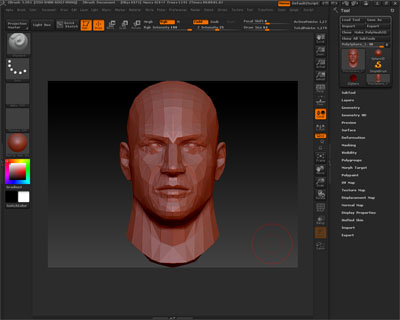
Make sure you already have a 3D mesh modelled, fully UV Unwrapped and exported as .OBJ format. Import this mesh in ZBrush.

Under Texture Map, click New Texture.
Then click New From Polypaint and you should be getting this upside down UVW Map of your mesh.

As you only want to affect colours and not the mesh itself, remember to turn off ZAdd. The next step is VERY IMPORTANT. Immediately start painting. You will not see anything. Don't worry.

Toggle the texture off and you will see the results of your earlier painting. If you missed the earlier steps and start painting after turning the texture off, the painting looks screwed up.

Click New from Polypaint to register the new changes and click Texture On to see the changes.

Bring your cursor to the UV thumbnail and you can see the details painted.

When you are ready to export the painted map, click on Clone Texture.

The painted map should be transferred to the left side.

Go to Texture and Rotate the painted texture.

Click on the left hand side image and Export. Done!
Subscribe to:
Posts (Atom)