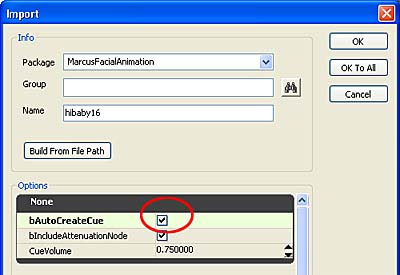
Open up UnReal Editor and import the sound and Marcus static mesh you exported in Max earlier. You should have a 16bit wav sound file ready for this exercise. Turn on bAutoCreateCue. You need a SoundCue file to work with FaceFX Studio.
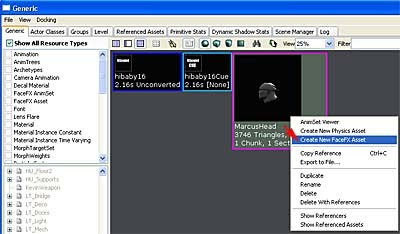
Select on the Marcus static mesh, right click and Create New FaceFX Asset.
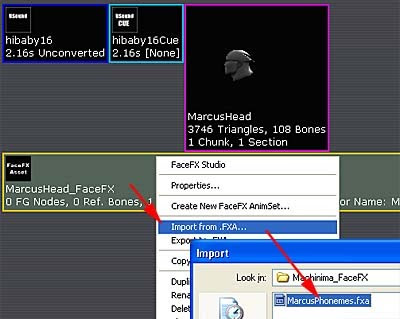
Import your .fxa file into this FaceFX Asset.
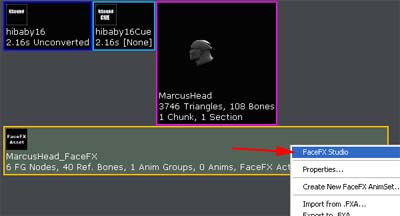
You are now ready to work with FaceFX Studio.
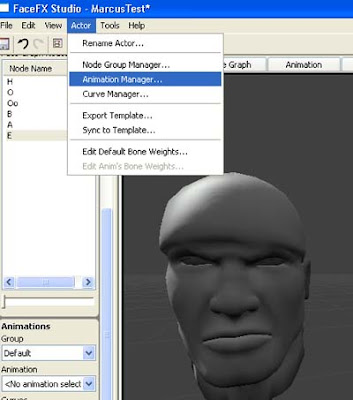
Go into Animation Manager and...
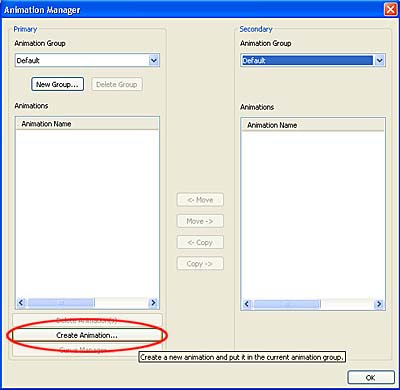
Create Animation... just be sure to...
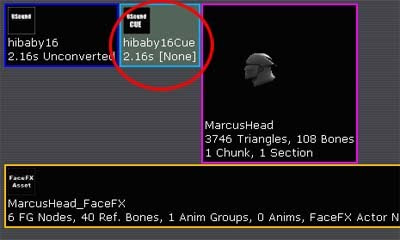
Select your SoundCue before proceeding in the Animation Manager.
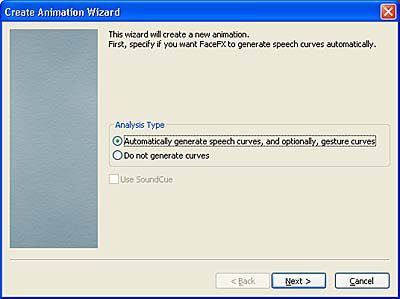
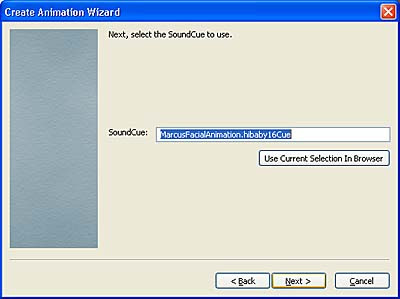
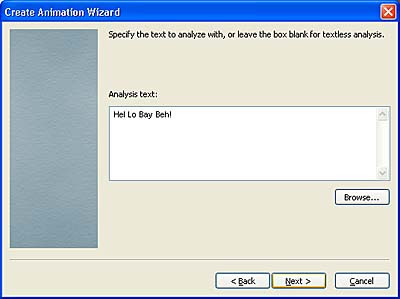
Click Next for the next few screens. My SoundCue says "Hello Baby" so this is what I typed in...
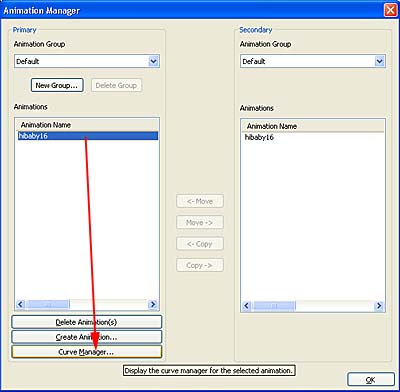
Select the animation you created and go to Curve Manager.
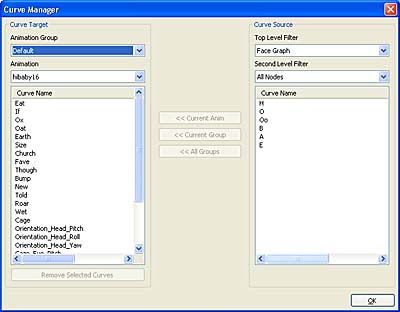
On the left are the suggested facial expressions you may need. On the right are the custom facial expressions I exported from Max.
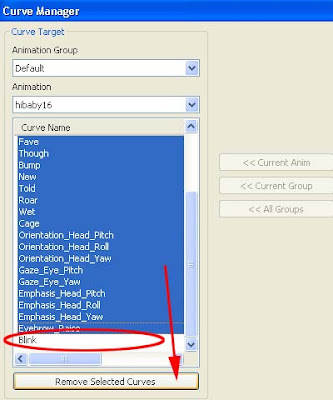
I will only be needing one curve, in this case, I chose "Blink". So remove the other curves as you won't be requiring it.
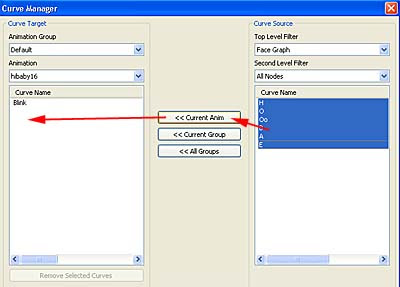
Move your custom curves from the right, over to the left.
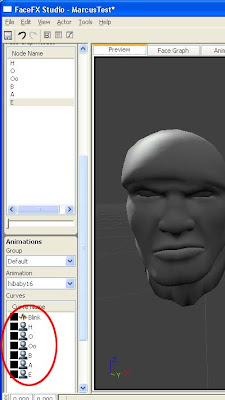
You should get something like this.
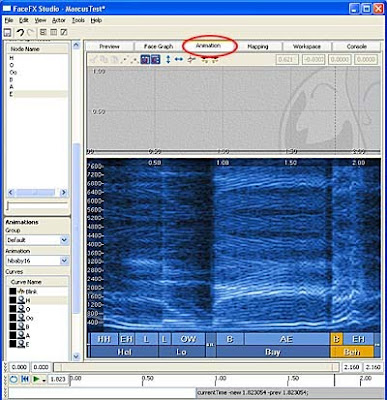
Click on the Animation Tab. Notice the blue bottom are where I defined "Hello Baby" earlier. Scrub through it and arrange your phonemes where you think they ought to be.
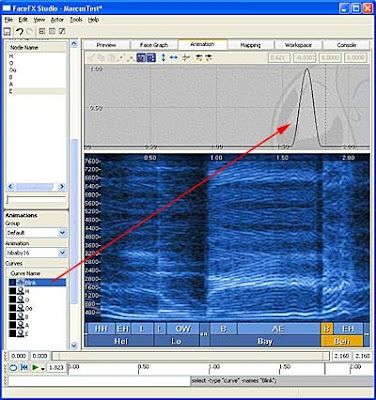
Click on "Blink" and notice it has a curve. If you click on the other custom phonemes and attempt to create curves on it, you can't (or at least I don't know how). If you click on say "H", copy and the click on the upper right (grey) curve area and paste, NOTHING HAPPENS. I was stumped for awhile here. Maybe it's a bug, who knows? Here's how I went around this...
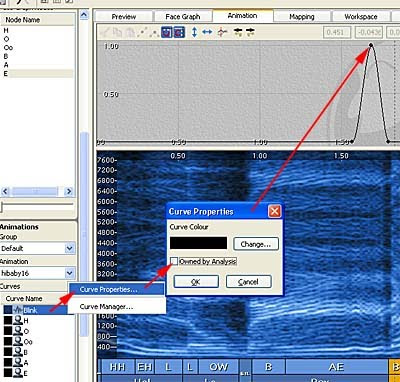
Rightclick on "Blink". Go to Curve Properties and uncheck "Owned by Analysis".
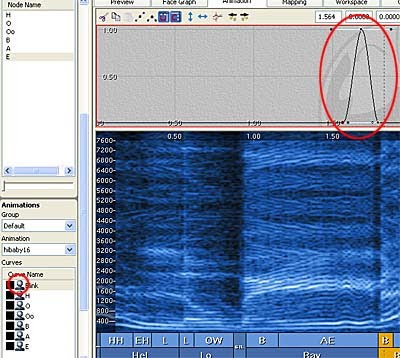
Notice the icon of "Blink" changes and your curves are selectable now.
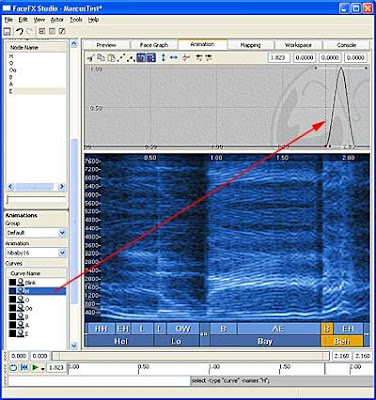
Marquee select the Blink curve and Ctrl+C (Copy). Then switch over to "H" channel, click on the curve area and Ctrl+P (Paste). You will have an instant curve but this time, if you Preview the animation, Marcus will have a "H" mouth shape at that timeframe. Shift the curve, adjust according to your needs.
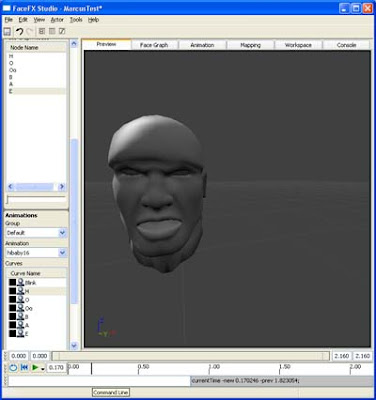
Keep doing this until your character is talking according to speech.
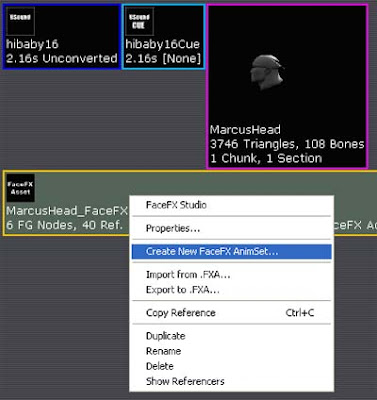
In order to use this in Matinee, you need a FaceFX Animset.
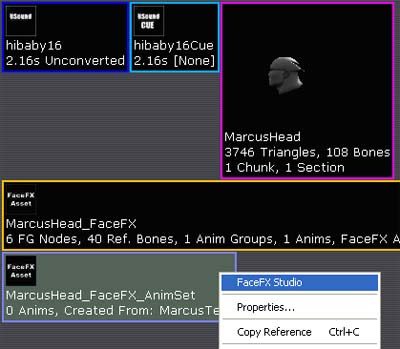
With the Animset done, access FaceFX Studio once more.
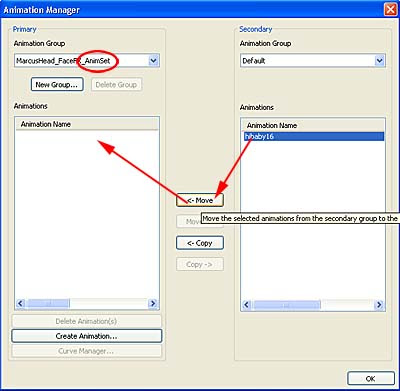
Go to your Animation Manager and move your animation to the Animset.
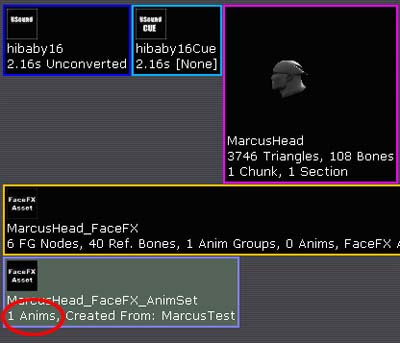
Notice your Animset is no longer empty.
Phew! The hardest part is finally over! In Part 3, we will put everything into Matinee and that's where the real fun begins!
No comments:
Post a Comment